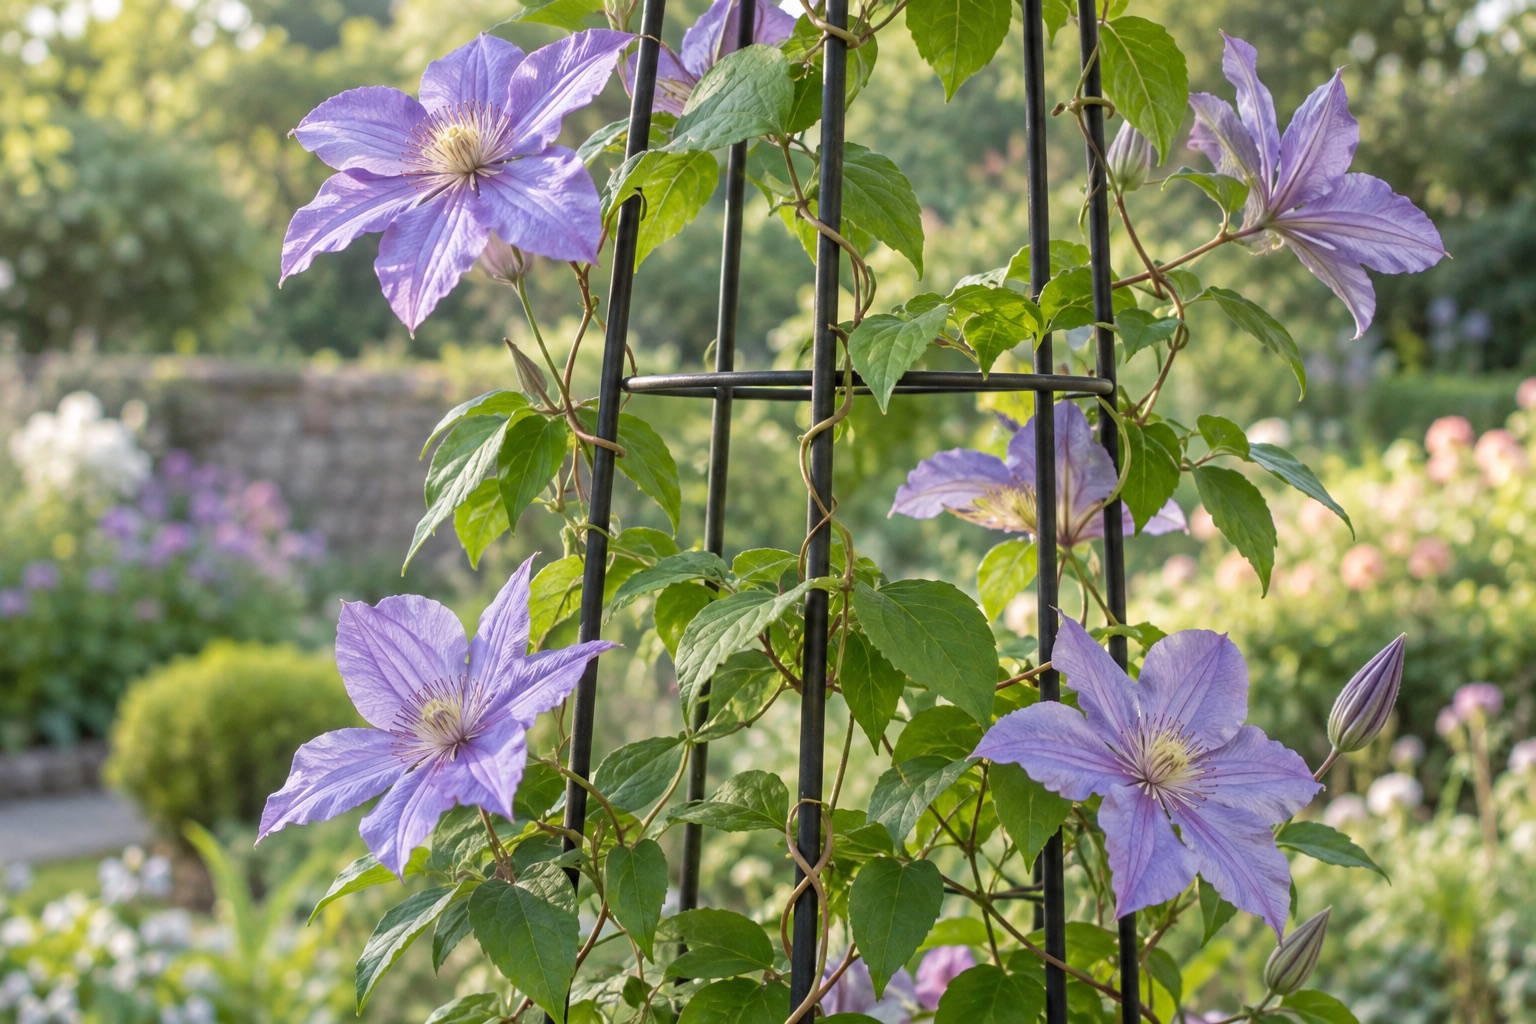
A clematis can cover a support beautifully while still struggling to climb the support you bought for it. The difference is often in the small parts: many vining clematis use their leaf stalks to catch narrow wire or lattice, so a frame made only of broad decorative bars may give them little to hold. Start with the plant label, then inspect the actual members the new growth will reach. A suitable existing fence with narrow wires can be a better answer than a new obelisk.
This guide is for vining clematis. Some clematis are herbaceous or do not climb in the same way; Illinois Extension's clematis publication makes that distinction. Use the attachment method to check whether a support gives the leaf stalks a practical route upward.
Check how your clematis actually climbs
A vining clematis does not glue itself to a wall, nor does its main stem wind around a post like a twining vine. Its leaf petioles, the small stalks connecting leaves to the stem, curl around a suitable support. Illinois Extension's vine attachment guide points to wire, chain-link and thin lattice as useful surfaces for this method. That explains why a narrow mesh can be more functional than a visually impressive frame with a few thick uprights.
Look at the part a young shoot will touch first, not only at the frame's overall material. A maker may give the diameter of its main tubing while leaving the width of decorative flat bars unspecified. A clematis can encounter several different shapes as it moves upward. Illinois Extension's clematis publication advises adding graspable material when a support is more than ¾ inch in diameter. Use that as a prompt to inspect or add narrow material, rather than as a guarantee that every member below the number will work for every cultivar.
Picture a clematis beside a smooth wooden post. The post may be sturdy, but the leaf stalks have no narrow route around it. A separate, properly attached wire or mesh layer can supply that route while the post carries the structure. At a chain-link fence, the climbing surface may already exist; the harder questions are whether the fence is sound and whether the plant has space to spread. On an ornamental obelisk, check the crosspieces and the route between them. A vine that catches at the base still needs reachable places higher up.
Confirm the species or cultivar before planning the structure. A garden-center tag that says only “clematis” does not settle its mature size, pruning group, or climbing habit. If the label is missing, identify the plant through a reliable nursery or local extension resource before buying a support solely on a generic height claim.
Size the support for the plant you have
Measure the installed height and usable width, then compare them with the mature height and spread listed for your particular clematis. Some freestanding products advertise their overall length, including the portion intended to enter the ground. The visible structure can be shorter. A six-foot installed obelisk may suit one cultivar and leave another crowded; plant identity matters more than the word “clematis” on a product tag. Iowa State Extension's clematis guide is useful background, while the specific plant label should anchor your size decision.
Sketch the space as a front view and a top view. For a border plant, mark how far its growth may extend into a path or neighboring shrub. For a container, mark the outer pot width and the usable footprint for a support. For a wall, decide whether you want a narrow column of flowers or coverage across a wider panel. This simple drawing often shows that a tall, narrow tower cannot provide the horizontal area you expected.
| Place | Likely useful form | Check before buying |
|---|---|---|
| Existing sound fence | Narrow mesh or separately installed wires | Condition, access behind growth, and the route from the plant to the first graspable member |
| Open border | Freestanding obelisk or a properly installed panel | Installed height, footprint, ground method, and room to work on all sides |
| Wall planting | Wall panel or tensioned wire system | Surface and fasteners, stand-off, and space for future pruning |
| Container | Support sized as part of the whole pot arrangement | Pot stability, attachment to the pot, and the plant's eventual scale |
These are layout starting points, not structural ratings. A wall panel and a freestanding panel can have identical climbing surfaces but entirely different installation risks. If a product page does not give the information needed to assess your setting, ask for the current installation sheet or choose a simpler, better documented design.
Plan the route from soil to the first tie point
The first few inches matter. Place the support so young shoots can reach its narrow members without being pulled sharply away from the crown. A structure installed too far back may look centered in a bed while leaving the vine unsupported at its base. Consider the soil area and established roots before pushing stakes into an existing planting; follow the maker's placement instructions and avoid assuming a stake length suits every soil.
Guide new growth gently toward the support and revisit it as the plant grows. The support should let you see where stems are going and reach them when they miss the intended route. Avoid tying a stem so tightly that it cannot expand. The purpose of an early tie is guidance, not making a thick post behave like a narrow trellis. The plant's care and pruning needs will continue after the initial installation, so access is part of the design.
For a wall, look beyond the attractive panel. You need a suitable mounting surface, appropriate fasteners and a way to reach the back or sides when growth becomes dense. A narrow clematis wire arrangement can be less visually prominent than a decorative metal panel and may be easier to adjust, but its anchors still need to match the wall. Neither this article nor a plant-care source can certify the wall or the hardware.
For an open bed, walk around the intended footprint before planting. Can you weed and prune behind it? Will its base block a path? Is there room to lift it out if the maker's instructions call for seasonal storage? Those everyday actions can make a modest, accessible support better than a taller one positioned where no one can tend it.
Compare the forms by what they solve
Wire or narrow lattice is the straightforward choice when you already have a sound fence or a mounting plan. It offers frequent small places for leaf petioles to catch and can cover a broad area. Check the exact wire diameter, opening, corrosion suitability and attachment method. A sheet of mesh loosely leaned against a wall does not become a secure installation merely because the plant likes the surface.
A freestanding obelisk creates a focal point in an open bed and gives you access from several sides. Its drawback is that a decorative outline may have too few narrow members between large uprights. The four-support comparison looks at published dimensions and shows why installed height and member geometry are separate questions. If you already have an obelisk with broad bars, a compatible narrow climbing layer may be more sensible than replacing the whole structure.
A wall trellis works when a garden bed runs along a building or fence and you want more vertical coverage. It makes mounting the central decision. Check whether the maker supplies brackets, how much stand-off they create, and which fasteners are specified for your surface. If the wall is unsuitable, a separate freestanding structure may avoid a risky guess, though it still needs its own installation assessment.
A container support keeps the plant and trellis in one arrangement, useful on a patio where ground installation is not an option. The tradeoff is that the plant, wet potting mix and exposed structure all affect stability. Do not infer that a tall product is suitable for a small pot from a styled photograph. Check the plant's mature scale, the support's pot attachment and the location's exposure as one system.
Use a buying checklist that catches the easy mistakes
- Write down the plant's exact name, mature dimensions and whether it is a vining form.
- Measure the space the whole plant may occupy, not only the support's footprint.
- Find the thickness and spacing of the members the leaf petioles will actually reach. If the listing only specifies the main tube, ask about the remaining geometry.
- Compare installed height with advertised overall height. Mark where the structure enters soil or attaches to a wall or pot.
- Read the current installation instructions for the exact size and surface. Check what hardware is included and what must be chosen separately.
- Stand where you will prune and guide the vine. Make sure you can reach the places the plant is likely to use.
A useful decision can be “do not buy yet.” If the exact cultivar is unknown, identify it. If the support has suitable thin lattice already, use it. If the candidate's only appeal is height and its graspable members are unclear, ask the maker for detail or choose a design with clearer evidence. None of these checks requires a claimed load rating that a listing does not provide.
Choose the simplest form that gives the vine a route
For most vining clematis beside a sound fence or wall, begin with a properly installed narrow climbing surface and enough room for the cultivar's eventual spread. Choose a freestanding obelisk when you need a plant in an open bed and can verify both its reachable members and its installation. If you are planting in a container, choose the pot and support together instead of treating the trellis as an accessory added afterward.
The final fit check is physical: trace a path with your finger from the emerging shoot to the top or side of the proposed support. If that path crosses long stretches of broad, smooth bar with nothing to catch, the plant may need a narrow layer or a different support. If the route exists and the installation suits the site, the purchase has a clear job. For published examples, see our clematis support comparison.