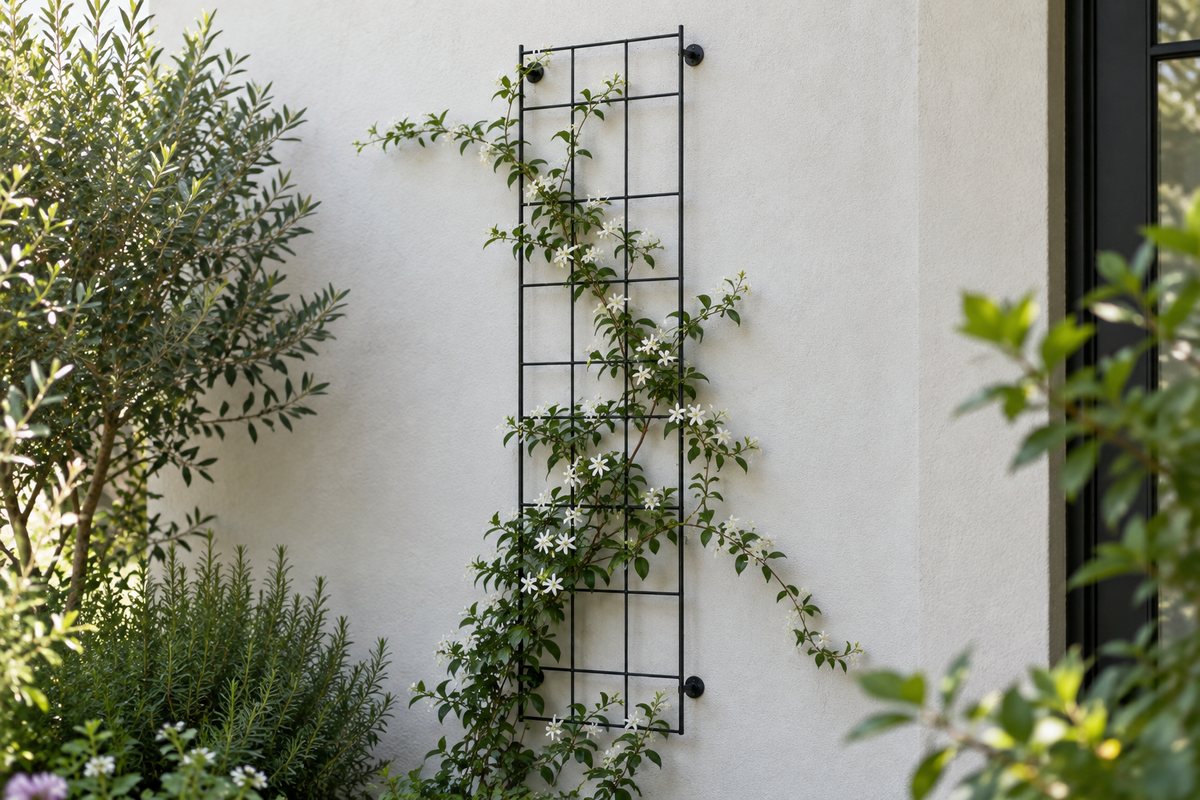
The large Exeter Wall Trellis gives a gardener a broader panel than many narrow decorative wall frames: Gardener's Supply lists it at 34 inches wide and 42 inches high. Its installation sheet is equally important. It does not provide screws or anchors because the correct hardware depends on the wall. We recommend investigating this panel when you want a defined, relatively broad training area and can make a sound wall-mounting plan.
This profile covers the large selection on the Gardener's Supply listing, associated with SKU 12125 on September 27, 2026. A wall with unknown material or condition is a reason to resolve the installation before buying the panel.
Use its width for the right planting job
At 34 by 42 inches, the large Exeter is wider and lower than several tall, narrow wall trellises in our comparison. That form can make sense beneath an area you want to keep below a window or across a wider wall bay. It is less obviously suited to a tall, thin strip beside a door. Measure the actual wall area and mark everything that must remain accessible before treating the panel's dimensions as coverage.
For star jasmine, NC State Extension describes a twining plant. Sketch where its stems would begin, how they would reach the panel and how they would move across it. If the plant is expected to cover a much larger area, this one panel is a starting section rather than the entire design. Keep room to prune the edges as growth expands beyond the metal.
For a climbing rose, UConn explains the need to guide and revisit canes. The broad panel may offer a useful area to tie within, but its forty-two-inch height is a clear limit for a taller arrangement. Ask where the main canes will run after they reach its edge. A second panel or a different support shape may be needed; do not force the plant into a small rectangle because the product fits the wall.
Consider a narrow passage along the wall. A panel can fit without taking ground space, but the plant may project outward and the gardener still needs room to reach the ties or twining stems. Draw both the metal outline and the likely working area. The useful installation is the one you can maintain, not merely the one you can fasten.
Read the brackets as an installation system
The maker's manual shows wall brackets and specifies 28–30 inches between lower brackets for the large version. That is a valuable exact-variant detail for layout. It also means you should check whether suitable structural fixing points exist where the brackets need to go. The manual leaves screws and anchors to the installer because wall material varies. Do not treat omitted hardware as an invitation to use whatever screws are in a drawer.
Identify whether the proposed surface is solid wood, masonry, framing behind siding, a fence panel or something else. Check its condition and follow the current instructions for the exact product. Where the substrate or loading is uncertain, obtain local installation advice. A product page can supply panel dimensions and bracket layout; it cannot certify the wall on your property.
The listing gives a panel depth of ¾ inch. That number is not the same as confirmed distance between a mounted panel and the wall. The brackets and final assembly determine the actual arrangement. If you need hand access behind the growth or a particular wall clearance, inspect the current installation drawing and verify the installed geometry rather than substituting panel thickness for stand-off.
| Published detail | Why it matters | What remains open |
|---|---|---|
| 34 × 42 × ¾ in panel | Defines the bare coverage shape | Growth beyond the frame and final wall clearance |
| 28–30 in lower-bracket spacing in manual | Helps locate potential fixing points | Whether the wall has sound points at those locations |
| Screws and anchors omitted | Hardware must match the wall | Exact fasteners and professional advice if needed |
| Powder-coated steel | Describes published construction | Does not establish load or long-term performance at this site |
Plan the plant route and your reach
Mounting the panel is only half the job. The first stems must reach it without being pulled sharply from the base. Mark where the plant will be rooted relative to the bottom edge. A panel positioned high to avoid splashes or clear another feature may leave an awkward gap below. If that gap needs an added route, design it deliberately and ensure any component is installed appropriately.
Plan how you will reach the back, sides and top after foliage develops. A wall support can make a narrow garden feel more open than a ground frame, but it can also hide the area behind a dense vine. Leave access to inspect the wall and tend the plant. Do not mount over a service panel or other feature that you will need to open later.
For a rose, imagine loosening a tie on the far side of the panel next year. For star jasmine, imagine trimming a stem that has gone beyond the intended edge. If those tasks are impossible from the available path, shift the panel or use a different form. This maintenance test can matter more than the small differences in finish or decorative pattern between listings.
Choose another form when the wall is the obstacle
If you cannot identify a suitable fixing point, a freestanding panel with a verified ground method may be easier to assess. If you need a very tall column, the Exeter's broad, lower shape may not serve the design; compare narrower vertical panels. If a sound fence already has usable members, adding this panel may supply little new function.
A climbing hydrangea is a separate case. Its aerial roots and possible scale raise surface and structural questions that the Exeter listing does not answer. Do not treat a wall panel marketed for vines as a verified support for that plant. Use the climbing-hydrangea guide to decide whether a separate support belongs in the plan at all.
Confirm the large variant and current specifications at the maker before ordering.
Make a wall plan before a purchase plan
- Measure the intended coverage and confirm that 34 by 42 inches serves it.
- Identify the exact plant and trace its twining or tying route through the panel.
- Find the lower-bracket positions from the current manual and check the actual wall at those points.
- Choose wall-appropriate fasteners under the maker's instructions or local professional guidance.
- Verify final clearance and leave access for plant care and wall maintenance.
- Choose a different support if the wall, planting scale or working space makes this panel awkward.
We recommend investigating Exeter large for a broader, lower wall display where the mounting surface can be properly assessed. Its most useful published advantages are the defined coverage and a manual with bracket layout. Its decisive limitation is that a safe installation depends on information the listing cannot know about your wall. Solve that first, then decide whether the plant route fits the panel.